
Firebase Hosting to deploy your web application

Summary
Minimalism in web design prioritizes simplicity and functionality, enhancing user experience through clean interfaces and faster load times. Its adaptability across devices and ease of maintenance make it a preferred choice for modern web development.
Introduction
Connecting your app deployment to a unique CI/CD pipeline opens up a whole new level. The tedious process of creating, testing, and releasing apps can be automated with the aid of a continuous integration pipeline. Developers may spend less time on this and return to what they love most—creating apps! Code review procedures, automatic quality controls, and staging environments are additional ways that CI/CD pipelines support the maintenance of a high-quality codebase.
The Appeal of Minimalism
We will discuss how to use Firebase Hosting to deploy a AppHeros web application today. Next, we’ll go a step further and demonstrate how to use GitHub Actions to automate the entire procedure.
Conclusion
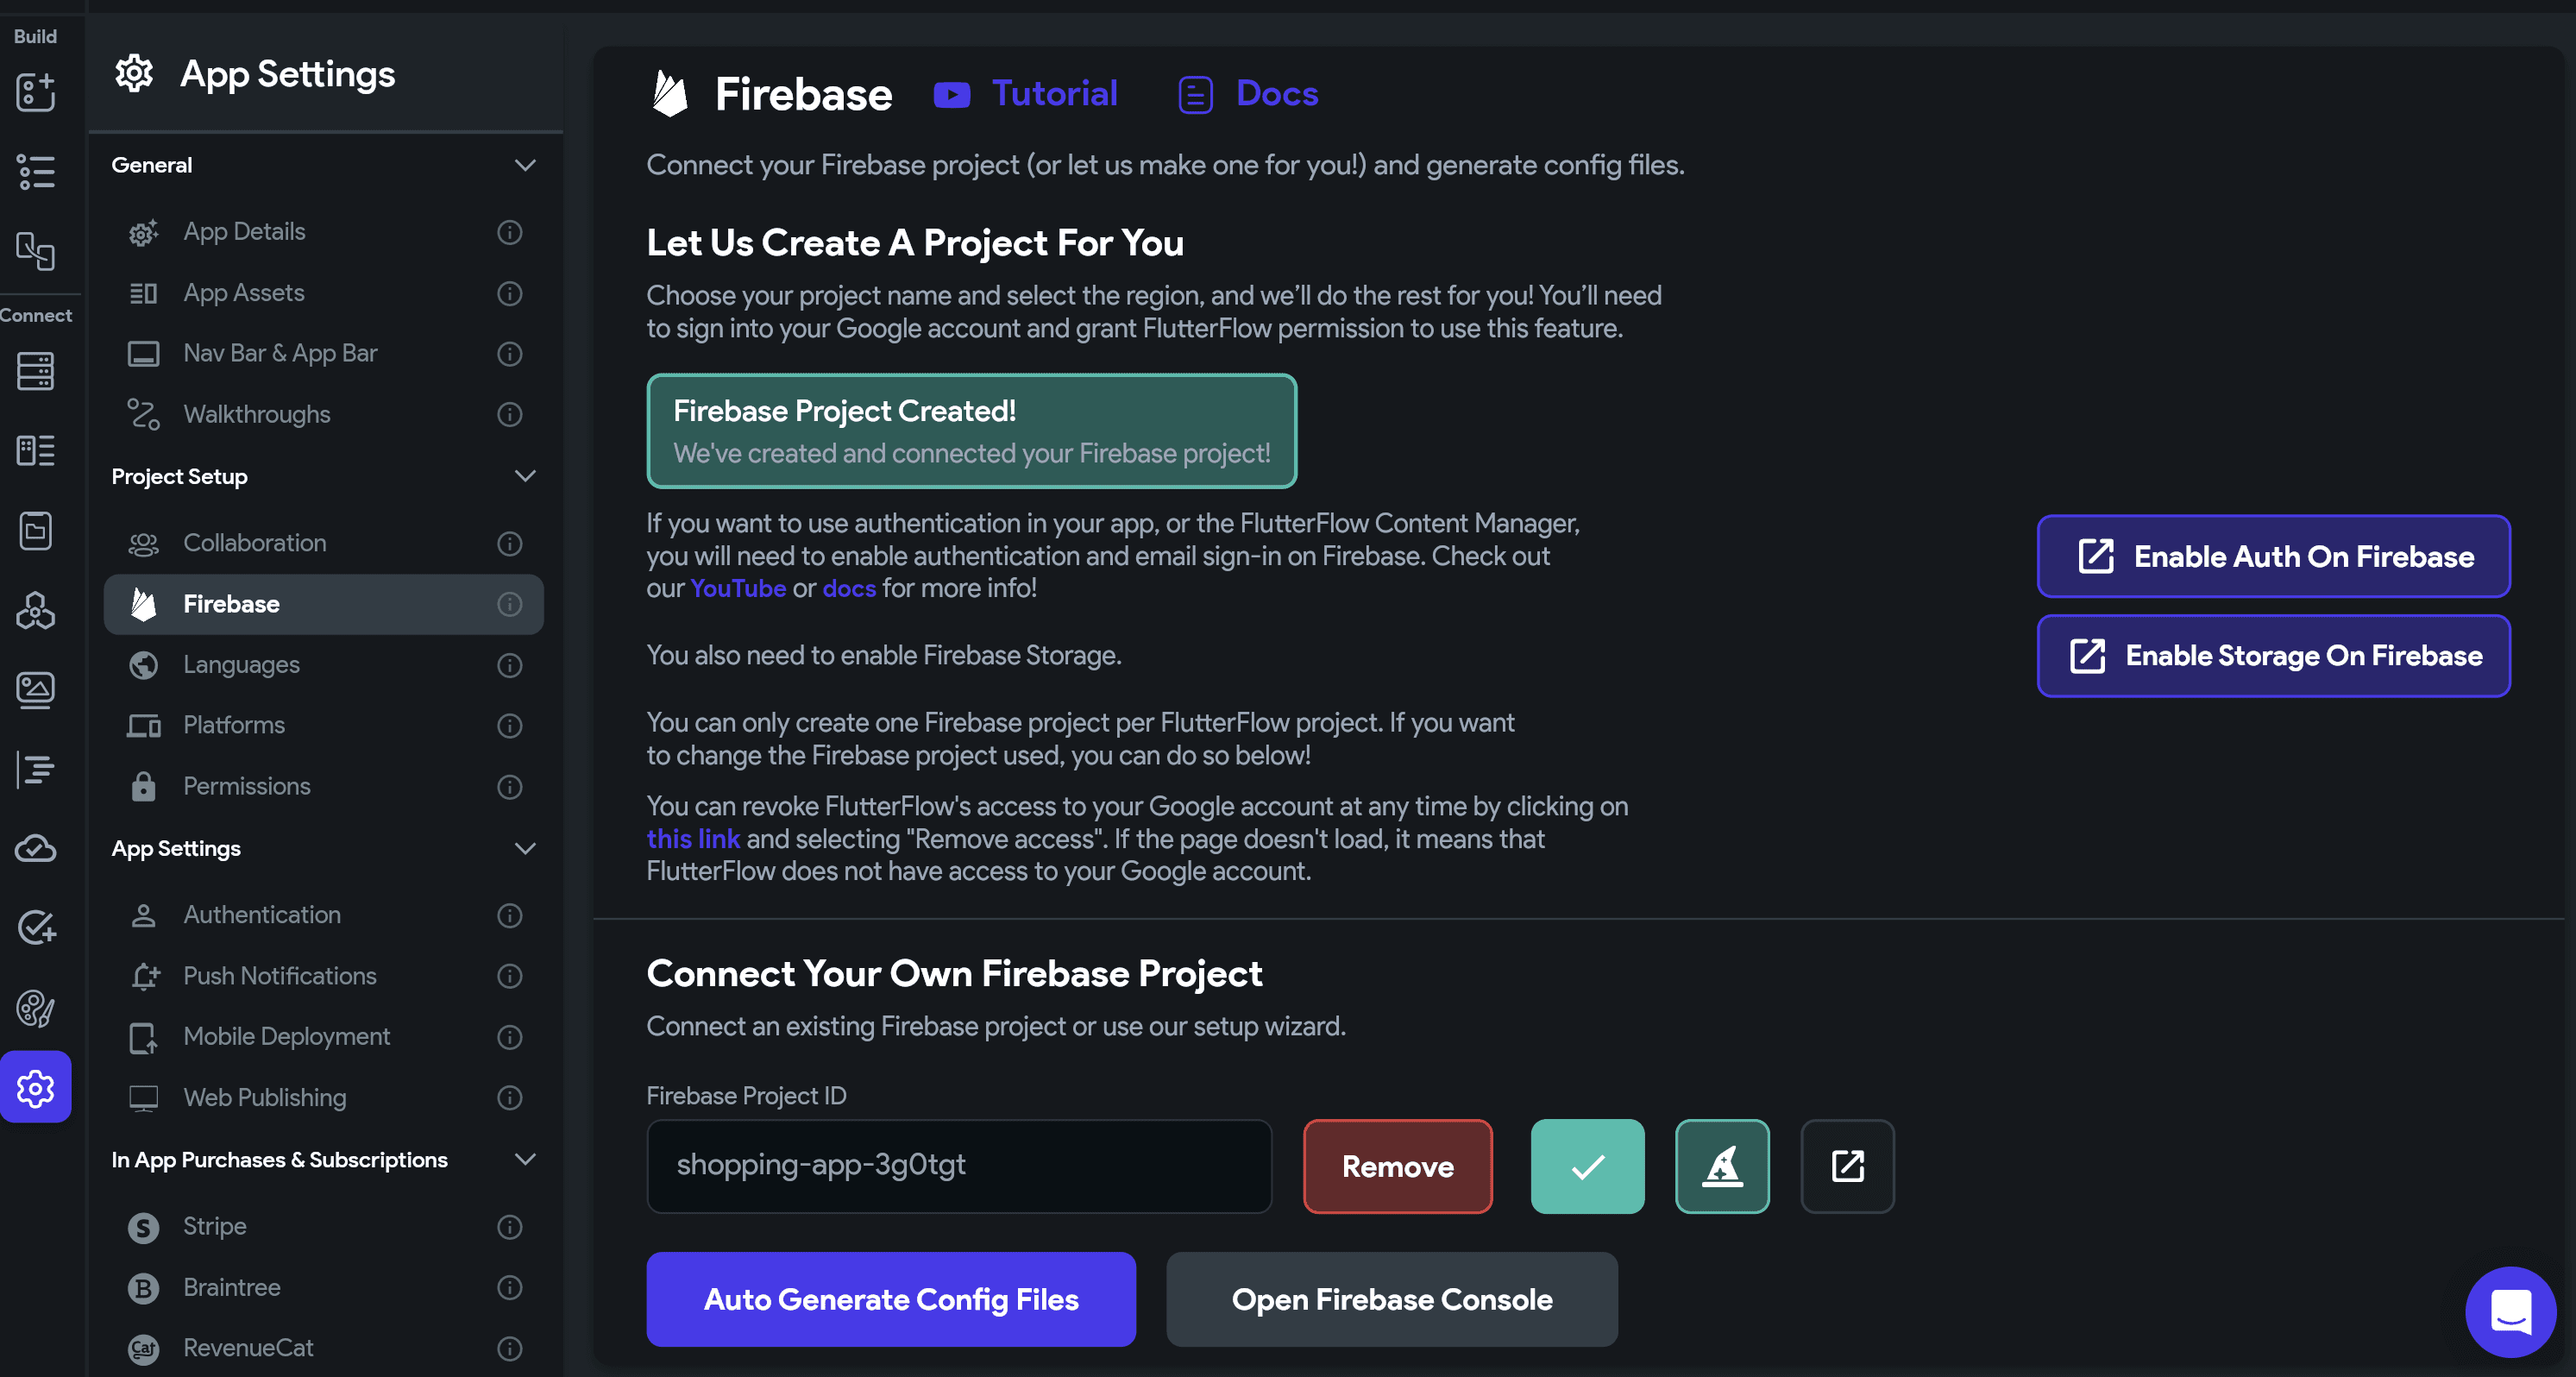
Firebase Setup
To begin, you will require a Firebase project and a AppHeros project. If you have already configured Firebase as a storage or authentication backend for your AppHeros application, you are ready to proceed. Go to console.firebase.google.com and start a new project if you haven’t already. The quickest method for deploying your code to the cloud is to use Firebase’s command line interface (CLI).
Follow the directions at firebase.google.com/docs/cli to install it.
Get the source code for the AppHeros project.
To deploy the program, we will need to obtain the complete source code. This functionality is accessible on AppHeros’s Website.
Setup Firebase
Fantastic! It’s time to set up hosting now that we have our source code. We can use the command line to accomplish all of this!
Start by initializing Firebase in your project directory using your terminal:
firebase init
Choose your Firebase project and then choose to use an existing project. You can also choose to create a new project if you don’t already have one.
Select
Hosting: Configure files for Firebase Hosting and (optionally) set up GitHub Action deploys.
For What do you want to use as your public directory? type build/web and hit enter.
For Configure as a single-page app (rewrite all urls to /index.html)?, enter y (yes).
For Set up automatic builds and deploys with GitHub?, enter n (but we’ll come back to this later!
For File build/web/index.html already exists. Overwrite? enter y
Set up is now complete – let’s give it a try!
Examine and launch your web application.
We must create the web application, which will add the necessary hosting assets to our build/web directory. We may then obtain a preview of the URL:
flutter build web firebase hosting:channel:deploy myFirstPreview
Whatever you want to title your temporary deployment, substitute it for myFirstPreview.
You can use this to get a URL that will allow you to preview your web application:
✔ hosting:channel: Channel URL (myFirebaseProject):
https://myfirebaseproject–myfirstpreview-26ie0a1g.web.app
[expires 2023-08-06 18:00:14]
Check out your work by clicking on the URL! You can move forward with a full live deployment if everything appears as planned:
firebase deploy
Note: Although it’s not required, previewing your app is a smart idea to ensure everything is working properly before launching!
Conclusion
You’ve successfully launched your web application! You can view all the helpful information on deployment history, app size, and other topics by going to your Firebase project console from this point. If you want to switch it to your own domain, you may even add a custom one.